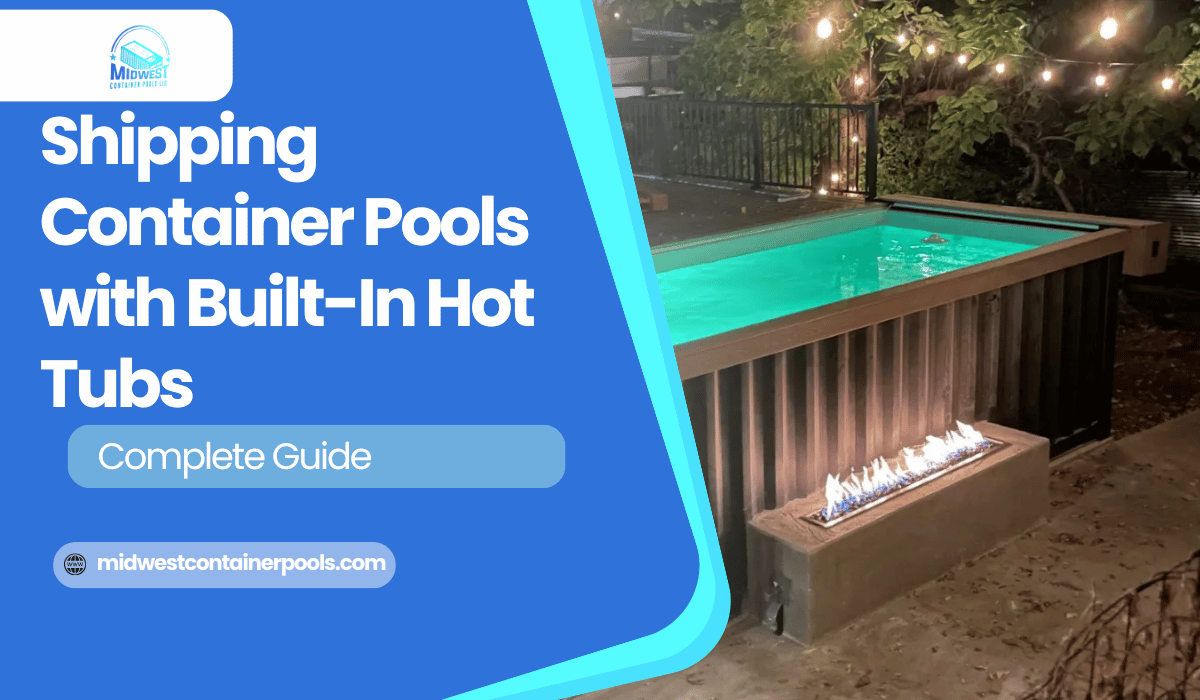
How to Install Your Shipping Container Pool
Installing a shipping container pool is an innovative way to get a backyard swimming pool quickly. This container pool installation guide will walk you through everything step by step, including shipping container pool site preparation, foundation options (like concrete slabs), in-ground versus above-ground setups, plumbing and electrical hookups, and even DIY conversion tips. In short, it’s a comprehensive container pool setup guide from start to finish.
Are shipping container pools easy to install? In many ways, yes – they arrive largely pre-fabricated, making the process faster and simpler than building a traditional pool. You can install a shipping container pool in your backyard in a matter of days once the site is ready. However, “easy” is relative: you’ll still need proper planning, a solid foundation, some heavy equipment, and adherence to safety rules and codes. If you’re wondering how to install a shipping container pool, read on. We’ll cover how to install your shipping container pool on concrete (for an above-ground setup) and how to install your shipping container pool in the ground (for an in-ground look), as well as essential DIY insights on how to make a pool from a shipping container yourself.
Quick Overview: Prepare the site with a level foundation, have the modified pool delivered, and connect the filtration and plumbing systems. That’s the basic idea. To break it down further, here are the primary steps for any container pool project:
- First prepare the site by leveling the ground and creating a strong foundation, such as a concrete slab.
- Next, modify the container, reinforcing it and making it watertight, and install the necessary plumbing and filtration systems.
- Finally, install the pool in its prepared location and connect all utilities.
Each of these steps involves important details and decisions, which we’ll expand on below. Let’s dive into the complete installation guide.
Planning Your Container Pool Project (Permits, Regulations & Design)
Any successful shipping container pool installation starts with careful planning and understanding of local requirements. Before you break ground (or even order your container pool), take the following into account:
Permits and Codes:
Do you need a permit for a shipping container pool? In most areas, yes. A container pool is still a swimming pool, so standard pool building regulations apply. You will likely need a building permit from your city or county. Permit applications typically require you to show the pool’s location on your property, the electrical and plumbing plans, and how you’ll meet safety requirements (like fencing and gate locks). Research your local container pool permits and regulations early. It’s much easier to get approval beforehand than to deal with fines or modifications later. Also, plan for required inspections during and after installation (we’ll cover the final inspection container pool installation needs later on).
HOA and Neighborhood Rules:
If you live in a community with a homeowners association, obtain HOA approval for container pool projects before you start. Some HOAs treat shipping container pools like above-ground pools or outbuildings and may have restrictions on their appearance or placement. For example, they might require you to screen the pool from view or limit above-ground pool heights. Checking in with your HOA (and even giving neighbors a heads-up) can prevent conflicts.
Site Selection and Access:
Choose an optimal spot in your backyard for the pool. Consider shipping container pool site preparation needs: the ground must be level and stable, and the area should be clear of any underground utilities. Call your local utility hotline to mark gas, water, or electrical lines before any digging (how to prepare ground for shipping container pool safely starts with knowing what’s underneath). Also ensure there’s enough clearance for delivery – a crane or forklift will need access to container pool crane delivery and placement points. That means overhead wires, trees, and narrow gates must be considered. An 8-foot wide container needs a bit more than 8 feet of width to maneuver in.
Design and Orientation:
Plan the container pool’s orientation (for example, where the pool entrance and any windows will face) and any decking or landscaping around it. Decide if you want it fully above ground, partially sunken, or fully in-ground. Many people opt to partially recess the container so it’s not towering too high above the yard, while still avoiding a full dig. Check if you’ll need retaining walls or extra grading for partially in-ground setups. Also plan where the equipment (pump, filter, heater) will go – often one end of the container houses these. If not, you’ll need space nearby for the equipment pad. The good news is everything you need to run your pool is neatly housed and pre-installed in most prefab container pools, usually in a dedicated section of the container itself, which minimizes space needed for equipment.
Engineering Considerations:
Shipping container pools are strong, but when you modify a container (cutting walls for a skimmer or window) or plan to bury it, it’s wise to consult an engineer. In some cases, you may even need an engineer certification for container foundation or structural modifications to get a permit. An engineer can advise on reinforcing the container’s walls to hold water pressure and on designing a foundation that safely supports the immense weight (remember, water is heavy – a filled 8×20 ft container pool can weigh 40,000+ pounds!). If you are installing in seismic areas or on challenging soil, professional engineering input is invaluable for safety.
Budget and Timeline:
Plan your budget and installation timeline. (We’ll cover detailed costs later, including how much does it cost to install a shipping container pool? and DIY vs. professional cost differences.) Order the container pool or materials well in advance. Fabrication of a custom container pool can take weeks or months, and even pre-made units have shipping lead times. Also, factor in the rental scheduling for heavy equipment like cranes or excavators.
In summary, installing a container pool requires the same diligence as any pool project: get your paperwork in order, coordinate any approvals, and ensure your site and support systems are ready. With planning done, let’s move to preparing the site.
Site Preparation and Foundation Requirements
Proper site prep is the literal foundation of your project. Whether you’re going for an above-ground container pool on a slab or dropping one in the ground, you must start with a stable, level base. Here’s how to prepare ground for shipping container pool installation:
Clearing and Leveling:
Mark out the area where the pool will sit. A good rule is to make the prepared area at least 1–2 feet larger than the pool’s dimensions on all sides. For example, if you have an 8’ x 20’ container, prepare a pad about 10’ x 22’. Remove any sod, roots, or debris. Then excavate or fill as needed to get the ground level across the whole site. Use stakes, string levels, and a laser level if available to ensure the area is flat. Low spots should be filled and compacted, and high spots graded down. The goal is a completely even, firm subgrade. Minor slopes can be corrected by digging out high side and using the soil to fill the low side (compact it well). Take your time here – a level foundation is critical for the pool to sit right. Uneven support could twist the container or make the pool waterline appear lopsided.
Foundation Type – Slab vs. Gravel:
Next, construct a strong foundation. What are the container pool foundation requirements? You have a couple of options:
- Concrete Slab: Pouring a reinforced concrete slab is a common and reliable choice for container pools. A slab effectively distributes the weight of the pool and water. Important concrete slab requirements for container pool installs include adequate thickness (typically 6 inches or more, with rebar reinforcement), proper curing, and a level finish. The slab should be slightly larger than the container’s footprint (extend at least 6–12 inches beyond each side of the container). For example, a 10’ x 22’ slab for an 8’ x 20’ pool provides a nice margin. Ensure the slab is completely cured and strong before placing the pool on it (usually you’ll wait ~7 days minimum after pour, longer for full strength). A well-made slab gives you a perfectly flat, solid platform so the container won’t settle or shift. If you’re in a cold climate, build the slab to handle frost heave (e.g. proper gravel base and maybe footings below frost line).
- Compacted Gravel Base: An alternative is a compacted crushed stone or gravel pad. This can work if done properly and is more DIY-friendly and cost-effective than concrete. To do this, excavate the area ~8–12 inches deep. Lay geotextile fabric for soil stability (optional but recommended), then fill with gravel (e.g. 3/4” crushed stone). Compact the gravel in layers using a plate compactor until you have a solid, level pad. The gravel should be well-compacted and level across the whole area. This type of base provides good drainage and can support the load if the soil beneath is firm. However, be cautious: gravel can settle a bit over time. It’s crucial to compact it thoroughly. You might also use concrete pavers or blocks on top of gravel under each container corner for extra support points. If going fully DIY, many have successfully set container pools on a crushed stone base.
Tip: Whether using slab or gravel, make sure the prepared base is truly level. Check corner-to-corner and use a long straightedge or laser. This will make container pool leveling and positioning much easier when the pool arrives.
Drainage Considerations:
If your pool will be in-ground or partially in-ground, plan for drainage around it. A buried metal container can trap water against it, which you want to avoid (standing water can cause corrosion or pressure issues). A common approach is a container pool drainage installation around the perimeter of the pool’s hole. This involves placing perforated drain pipe (often called a French drain) around the container base. Typically, you’d dig a trench just outside where the container walls will sit, lay a perforated PVC or flexible drain pipe in it, and surround that with gravel. Slope the pipe to lead out to a lower area, dry well, or storm drain if allowed. This way, groundwater or rain will be directed away from the container. Additionally, for in-ground installs, consider lining the excavation with a waterproof membrane or geotextile fabric as a moisture barrier. Some builders even paint the exterior of the container with tar or asphalt waterproofing to further protect against rust from moist soil. We will discuss drainage again when covering the in-ground installation steps.
Soil and Terrain:
Adapt your foundation to your soil type. Soft or clay-rich soil might require extra reinforcement – a thicker slab or deeper gravel base. If your area is prone to frost, incorporate insulation boards under or around the slab to prevent frost heaving, or dig deeper footings. On sloped yards, you may need to cut into the slope to create a level terrace or even build a retaining wall on the lower side. Ensure any slope is stabilized because a pool adds weight that could trigger settling if the ground isn’t secure. When in doubt, consult a soils or structural engineer to be safe.
By preparing the site with a level foundation now, you set the stage for an easy installation later. In summary, first prepare the site by leveling the ground and creating a strong foundation, such as a concrete slab. With the ground ready, we can look at the pool itself – especially if you plan a DIY conversion.
How to Make a Pool from a Shipping Container (DIY Conversion Steps)
So far, we’ve assumed you might be buying a ready-made container pool. But can you make a pool out of a shipping container yourself? Absolutely – many adventurous DIYers have done exactly that. Building your own container pool means converting a standard steel shipping container into a watertight, swim-ready structure. This DIY shipping container pool project is large in scope but can be rewarding and cost-saving (indeed, a motivated DIY shipping container pool project could cost under $20,000 to install versus $40k+ for a turnkey solution). Here’s an overview of how to DIY a container pool:
Choosing a Container:
Start with a structurally sound container. A 20-foot container is popular for a pool (about 8’ x 20’ gives a decent plunge pool). Ensure the container isn’t severely rusted or damaged. High-cube containers (9.5’ tall) can provide extra depth if desired. You may buy a new or one-trip container for best condition, or a used one to save money (just inspect it thoroughly). Remove any interior flooring or walls that are chemically treated (most shipping container floors have plywood with pesticides – you’ll likely strip that out for the pool).
Cutting and Reinforcing:
Transforming the container into a pool involves cutting open the top and possibly modifying the sides:
- Remove the Roof: Generally, you’ll cut off the top of the container to create the open pool top. You can use angle grinders or blow torches for this heavy steel. Be cautious and wear proper safety gear. Often, the top rail of the container is left in place to maintain rigidity, and just the steel panels are removed.
- Wall Reinforcement: Shipping container walls are corrugated steel – strong for stacking containers, but when you remove the top (and if you plan to backfill soil around it), additional support is wise. Weld in some reinforcement ribs or steel tubing along the inside walls to prevent bulging once the container is filled with water. If you cut out sections (for example, adding a window or a side door in the pool for a spa section), you must reinforce around those openings with steel framing. An engineer’s input can help determine needed reinforcement spacing and size. It’s easier to add supports now than to fix a bowing wall later.
- Floor Support: The container’s floor (now the pool bottom) is usually corrugated steel beneath that plywood you likely removed. It can hold water, but some DIY builders choose to add additional metal beams underneath or a secondary steel plate floor for extra strength and to have a smooth bottom. If the container will sit on a flat foundation (like a slab), the entire base is supported, which is good. If it’s on piers or uneven ground, ensure the floor won’t flex – reinforcing beams can help.
Making it Watertight:
One of the biggest challenges is waterproofing the container’s interior. Remember, shipping containers are designed to keep water out, not hold water in. Raw steel will leak at seams and rust over time if exposed to constant water. You have a few options to create the pool interior:
- Epoxy Paint/Coatings: Some DIYers apply marine-grade epoxy or pool paint directly to the steel interior after thorough cleaning and priming. This can work short-term, but often is not a permanent DIY waterproofing, and repair solution for the long run. Paint can chip or blister, and any scratch can let water reach the steel. Still, if budget is a concern, heavy-duty waterproof coatings (like rubberized or epoxy paints) can be layered on all interior surfaces. Products exist specifically for waterproofing pools and even ones marketed for container pools that create a rubber-like membrane when cured.
- Pool Liner (PVC or Membrane): Another approach is installing a vinyl pool liner or flexible membrane inside the container. This is similar to how vinyl liner pools work. You’ll likely frame out the interior with some foam or padding to protect the liner from the rough steel, then have a custom liner made to fit the container dimensions. The liner method can be cost-effective and ensures waterproofing (the steel is essentially just structural, not in direct contact with water). High-quality liners or membranes (sometimes called architectural membranes) can be welded into shape and are very durable. For instance, some manufacturers use an architectural membrane insert rather than a basic liner – this is essentially a thick waterproof skin custom-fit to the container. A shipping container pool fiberglass insert is another premium option: this is a pre-formed fiberglass shell that is dropped into the container, giving a smooth finish. Fiberglass shells work well if made precisely, but they can be pricey and you must be careful not to crack them during installation. (Also note, a fiberglass shell needs the container to be true and square so it fits; any warping in an older container can cause fit issues.)
- Sprayed Concrete or Foam: A less common DIY method is to coat the inside of the container with sprayed concrete (shotcrete) or spray-on poly foam followed by a sealant. This essentially creates a new waterproof layer adhered to the steel. It’s complex and usually something done by professionals if at all (and it adds weight).
Whichever method, the goal is a continuous waterproof barrier on the inside. Many DIY-ers go with a heavy-duty epoxy plus a secondary liner for belt-and-suspenders protection. Keep in mind maintenance too – if using saltwater chlorination, avoid exposing bare steel (salt will accelerate corrosion quickly). Proper waterproofing now is critical so you don’t have to drain and fix leaks later.
Plumbing Installation:
Now, plan and install the plumbing fittings. Modify the container, reinforcing it and making it watertight, and install the necessary plumbing and filtration systems – this step is essential. You’ll need at least one skimmer (to pull water off the surface) and return jets (to push filtered water back in). Many container pools forego a bottom main drain to avoid cutting the floor (cutting the floor can weaken structure and can be a leak risk if not perfectly sealed). It’s acceptable to operate with just a skimmer and returns like an above-ground pool. If you do want a floor drain, you’ll need to cut a hole and weld in a pipe fitting in the bottom – not impossible, but be sure to seal it well and protect the area from rust. For the skimmer, cut an opening near the top of one side wall sized for a pool skimmer faceplate. Weld around the opening or attach the skimmer housing securely, and seal any gaps (use a good marine epoxy or sealant around bolts and flanges). Do similar cuts for return jet fittings (usually 2–4 jets near mid-depth on side walls for good circulation). If installing a pool light niche, that’s another cut and attachment to do. Each penetration in the container wall must be carefully sealed against leaks and the raw steel edges painted or coated to prevent rust.
Next, run PVC piping from the skimmer and returns to where the pump and filter will be. Typically, 2” PVC is used for suction lines (skimmer to pump) and 1.5”–2” for return lines. Include valves so you can shut off flow if needed. Penetrate the container wall near the bottom or top corner with a hole large enough for the pipes or use bulkhead fittings. Seal around any pipe penetrations with marine-grade sealant. If the equipment (pump/filter) will sit outside the container (on a pad nearby), run the pipes out through one end. If the equipment will be housed inside a section of the container (some DIY designs partition a portion of the container as an equipment room), then plumb accordingly within that space. Container pool equipment installation in a DIY build means setting up the pump, filter, possibly a heater or chlorinator, and connecting all hoses or pipes. Place the pump and filter on a stable surface that will stay dry. Many use a small concrete pad or a platform for equipment. Connect the skimmer line to the pump inlet, pump outlet to filter, filter to heater (if any) or return line, then return line back to the pool returns. Use Teflon tape or thread sealant on threaded connections and ensure everything is tight.
For electrical, at this stage, also plan conduit runs for your pump, any lights, and bonding wires (more on electrical in a dedicated section below). Do not fill or finish the pool until plumbing is pressure-tested for leaks – it’s easier to fix now than after it’s full of water.
Corrosion Protection:
Before your pool ever sees water, address rust prevention. Grind off any existing rust and treat those spots with rust converter or primer. Then coat the exterior of the container (especially if going in-ground) with a rust-inhibiting paint or coating. Many DIY builders will coat the outside with roofing tar or a bituminous paint if it will contact soil – this waterproofs it externally and helps prevent rust from damp earth. Inside, once plumbing and reinforcements are in place, make sure all exposed metal (around any cuts or welds) is primed and painted before you apply the final waterproofing or liner. DIY waterproofing, and repair solution products (like specialized sealants) can be applied to seams and around fittings. Essentially, you want to seal every potential path for water to reach the steel.
Building a pool from a raw container is a serious project – involving metalworking, plumbing, electrical, and waterproofing skills. If this sounds overwhelming, don’t worry: many people opt to purchase a prefabricated container pool shell from a manufacturer and then do the installation themselves. Prefab units come already modified and sealed. In that case, everything you need to run your pool is neatly housed and pre-installed, from skimmer and jets to pump and filter. You’ll simply prepare your site and have the finished container pool delivered ready to hook up. But if you do go fully DIY, the steps above outline the core tasks. With the container pool itself ready, either via DIY conversion or from the factory, it’s time to install it at your site.
How to Install Your Shipping Container Pool on Concrete (Above-Ground Installation)
Now for the exciting part – placing the container pool on site and setting it up. First, let’s cover an above-ground container pool installation (one where the container sits on a concrete or gravel foundation, fully visible above grade). This is generally the simplest and quickest install method. You’ve already prepared the site with a level foundation earlier, so you should have a sturdy concrete pad or compacted base awaiting the pool. Here’s how the above-ground installation typically goes:
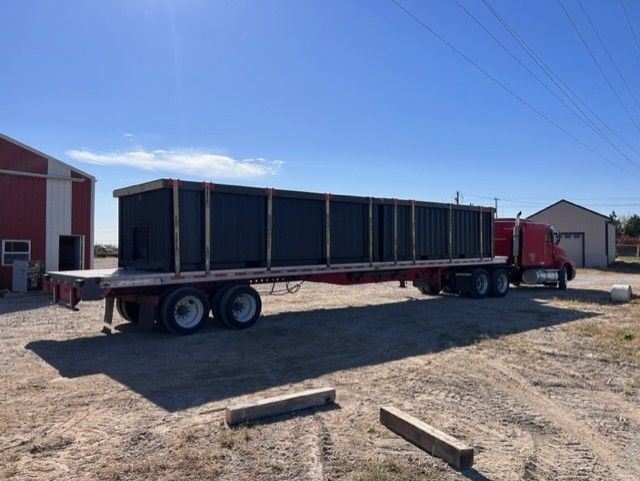
Delivery and Placement:
Coordinate the delivery of the container pool to your property. Most container pools are delivered by truck. Because a steel container is heavy (a 20’ unit can weigh ~5,000 lbs empty, and much more with modifications and water), a crane or boom truck is often used to offload and position it. This is where you’ll witness a big lift – literally. The delivery crew installs an 8-by-20-foot shipping container pool by hoisting it with a crane, using nylon straps or chains hooked to the container’s corner castings. The crane will swing the pool over and lower it onto your prepared foundation. Make sure the path is clear and the crane has room to set up. If a crane can’t access your yard, sometimes a large forklift or telehandler can carry the container into position, but cranes are most common for backyard placements.
As the pool is lowered, the crew will guide it into the exact spot. This process requires precision – think of gently landing an airplane on a runway. The goal is to land the container squarely on the foundation lines you planned. Once it’s down, they’ll likely double-check measurements to ensure it’s centered and oriented correctly.
Leveling and Adjustments:
With the container on the ground, it’s critical to confirm it’s perfectly level in all directions. Use a level on the top edges of the container. Even with a flat slab, sometimes there are slight differences. If one corner is a tad low, you can jack up that corner slightly and insert a steel shim or two until the container is fully supported and level. Proper container pool leveling and positioning now will prevent the water from sloping to one end. It also ensures the doors (if any) and skimmer operate correctly. Ideally, the foundation was level so minimal shimming is needed. But don’t skip this check. The entire weight will settle onto whatever contact points there are, so ensure each corner and edge has firm support. If on a concrete slab, the container’s steel bottom rails should be fully bearing on the slab. If on a gravel base, confirm there are no rocking motions and that the weight is evenly distributed (you might use a long straightedge under the container to ensure it’s not bridging a high spot and a high spot leaving a gap in the middle).
Securing the Pool (if needed):
Most above-ground container pools simply sit by gravity – no anchoring is usually required due to their weight. However, in certain situations (like in hurricane-prone regions or if the pool is empty and strong winds occur), you might consider securing it. This can be done by welding small brackets from the container to embedded anchors in the concrete, for example. If you’re in a flood zone where buoyancy could lift an empty pool, definitely anchor it or keep it filled. For a standard backyard scenario, though, anchoring isn’t typically needed once filled with water (the water weight holds it down very firmly).
Hooking Up Utilities:
If your pool came pre-plumbed and pre-wired, above-ground installation is very straightforward at this stage. Usually, everything you need to run your pool is neatly housed and pre-installed in one end of the container – filtration system, pump, heater, lights, etc. You’ll just need to connect the pool’s electrical supply and perhaps some external plumbing lines (for example, a drainage or backwash line). We’ll go into detail on container pool plumbing and electrical in the next section, but the basic idea is that for an above-ground unit, you might simply run power from your house to the pool’s control panel, and connect a garden hose or fill line to fill the pool. If the filtration equipment is not built-in, you would place it adjacent to the pool now and connect the pipes from the pool fittings to the equipment.
Finish the Exterior (optional):
Many people choose to dress up the exterior of an above-ground container pool. While some love the industrial chic look of a container, others prefer a more polished appearance. You can add cladding or surround the container with decking. For example, you might build a wooden deck on one side to act as a lounge area and a step-up platform. Or attach wood siding, composite panels, or even stone veneer to the container’s sides to blend it with your landscape. These aesthetic additions are optional and can be done later, but plan for any supports or footings if you’ll add a deck. Also, consider adding insulation to the exterior if you want – foam board insulation under a cladded wall can help maintain water temperature (the metal walls alone don’t insulate well, meaning heat can escape quickly or the sun can overheat the water – insulation mitigates that).
Safety Barriers:
Even above-ground pools need safety measures. Most building codes require a barrier (fence) around any pool over a certain depth (often 18 inches). One advantage of above-ground container pools is that the container’s height (8 feet or so) and sheer sides can act as a barrier – you typically won’t need a 4-foot fence on all sides if the pool walls themselves are that tall. However, you will need to secure the access point. Usually, this means having a locking gate on your deck or ladder. For instance, you might have one end of the container converted into a little stair entry; that stair area should have a self-closing gate or removable ladder to prevent unsupervised access by children. Always check local safety codes: some places require a fence around the property or pool regardless of pool wall height. In any case, plan to install any required fences or alarms at this stage before the pool is filled. Safety first!
An above-ground container pool can often be installed in a single day once the site is ready. In fact, it’s not uncommon that a crew installs an 8-by-20-foot shipping container pool by morning and by afternoon it’s filled with water and circulating. The speed and ease of above-ground installation is one of the big selling points of container pools – no long construction process. Up next, we’ll look at what’s different for in-ground installations.
How to Install Your Shipping Container Pool in the Ground (In-Ground Installation)
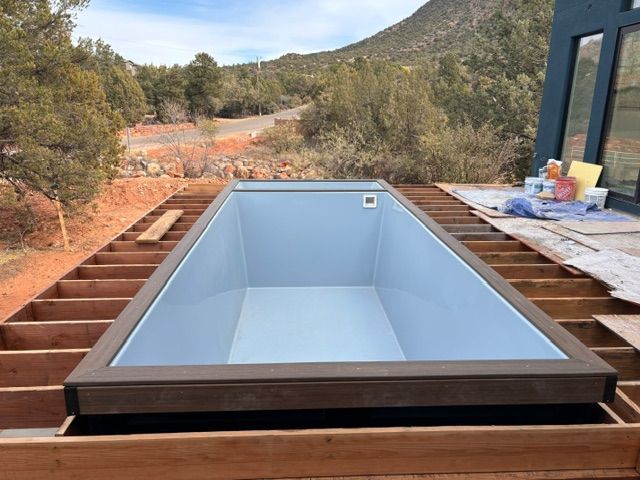
If you prefer the look of an in-ground pool (where the container’s sides are hidden and the pool is flush with the landscape), you can bury a shipping container pool. An in-ground container pool installation gives you a sleek look, but it does require more work in excavation and structural precaution. Essentially, you’ll be creating a vault in which the container sits. Here’s how to do it:
Excavation of the Hole:
Mark out the area to be excavated, making it larger than the container dimensions. You’ll typically want at least 1 to 2 feet of clearance on each side of the container for ease of placement, plumbing, and backfilling. For example, for an 8’ x 20’ container, you might excavate a hole ~12’ x 24’. The hole should be deep enough to accommodate the container’s height plus any base material. If you plan to pour a concrete base slab at the bottom, factor in its thickness. You can use a backhoe or excavator to dig the hole. First prepare the site by leveling the ground and creating a strong foundation, such as a concrete slab. In an in-ground scenario, this translates to digging down to a level subgrade. Make sure the bottom of the pit is level and undisturbed (or well-compacted) soil. If the soil is soft, you may need to over-excavate and fill with compacted gravel to create a solid base.
Base and Foundation in the Pit:
Just like above-ground, you have options for the base at the bottom of the excavation:
- Pour a concrete slab at the bottom of the hole for the container to sit on. This slab should be level and at least as large as the container’s footprint (a bit larger ideally). Use rebar for reinforcement. Let the slab cure fully. A concrete base ensures the container is supported evenly and won’t sink. It also provides a nice flat platform to ease leveling the pool.
- Or use a gravel bed at the bottom. Spread 6 inches or more of gravel and compact it flat. The container will rest on this. Gravel is good for drainage and easier to adjust if you need to tweak level, but be cautious about settling – once the container is in, you can’t recompact under it. Some installers place precast concrete beams or blocks on the gravel for the container corners to rest on, which can aid in leveling and keep the steel off direct soil contact.
Drainage System:
Before dropping the container in, install drainage around it. We touched on this in site prep, but it’s crucial in-ground. A typical container pool drainage installation involves laying a perimeter French drain. Place perforated drainage pipe (with a filter sock to keep sediment out) along the bottom of the excavation, encircling where the container will be. Slope this pipe to daylight (exit on a lower slope) or to a dry well/sump. Cover the pipe with coarse gravel. You can also lay a vapor barrier or waterproof membrane against the excavation walls to prevent groundwater from seeping toward the container. Essentially, you’re creating a wrapped drainage envelope around the container location. This way, any rain or groundwater will flow down to the pipe and be carried away, rather than accumulating and rusting the container.
Lowering the Container:
Now comes the big moment of setting the pool in the ground. Use a crane (or heavy equipment) to lift and install the pool in its prepared location. This step is often more involved than an above-ground drop because the crane operator must carefully lower the container into the pit without hitting the sides. Ensure there are spotters guiding it at each end. Having those 1-2 feet of clearance around the sides really helps. As the container is lowered, make sure no drain pipes or anything in the hole get snagged. Gently set the container onto the base. If on a slab, it should line up with where you want it. If on gravel, you might adjust it a bit by shifting with pry bars. Check alignment (is it oriented straight in the pit) and check level immediately. You may need to lift it back out briefly to adjust any high spots on the gravel or add a shim. Ideally though, your base is level and the container goes in and sits level on the first try.
Side Support and Backfilling:
With the container in place, the gap around it needs to be backfilled. But note: shipping containers are not designed to hold outward pressure from soil when empty. You should never backfill a container pool until there’s water in it. The water inside will push outward, balancing the pressure of soil pushing inward. So, a common approach is to partially fill the pool with water as you backfill incrementally. For example, add a foot of water in the pool, then add a foot of gravel backfill around the outside, and repeat. Use a free-draining material for backfill – gravel or crushed stone is best (avoid clay or soil that can hold water against the steel). Also, if possible, spray the exterior of the container with a coating of tar or rust-proofing paint before backfilling, for extra protection. Place the gravel backfill evenly around all sides to keep pressure uniform. Compact it gently in layers (don’t bang hard against the container wall, just use hand tampers or pour the gravel such that it packs in). If you plan on later pouring a concrete deck around the pool, you might backfill with gravel up to a certain level and then finish with a poured concrete collar. Ensure to not damage any exterior coatings or the container itself during backfill – sharp rocks scraping painted steel could invite rust later, so be mindful. Some builders put a protective layer on the container’s outside, like foam boards or dimpled foundation membrane, before backfilling. These can both insulate and prevent rocks from scratching the metal.
Retaining and Bracing (if needed):
If the excavation is deeper than the container’s height (for example, you plan to have the container’s top sit 6 inches below grade and then build a patio to flush), you may need to support that extra excavation height. Often a small concrete collar or retaining curb is poured at the top to hold the surrounding soil and create a ledge for pavers or coping. Similarly, if only partially in-ground (say container halfway out of ground), you might build a retaining wall around the exposed part for aesthetics and to hold back soil on the exposed side. Every site is different – just ensure no loose soil is going to collapse into your pool pit either during or after installation.
Coping and Decking:
Once the container is buried to the desired depth, consider how you’ll finish the top edge. Some container pool owners leave the top edge of the container exposed as a border. Others cap it with coping stones or wood to give a nicer touch for sitting. You can drill into the top of the container and anchor coping material if desired. Also, plan your decking or patio around the pool now – it’s easier to install anchors or supports while everything is accessible. A concrete pad or pavers around an in-ground container pool can really make it look like a traditional in-ground pool oasis.
Final Connections:
Just like the above-ground case, you will hook up plumbing and electrical once the container is in place. One difference: for an in-ground pool, any plumbing lines that run outside the container (like from a skimmer near the top to equipment outside the pit) should ideally be buried and perhaps run through conduit for protection. Ensure those lines were placed before backfilling or are in the backfill so that everything is tidy. Also double-check that your drainage system around the pool is working (you might run water near a corner of the pit and see if it flows out your drain outlet). It’s much easier to address any issues now before you’ve closed everything up.
In-ground installation is more labor-intensive, but the end result is a container pool that sits seamlessly in your yard. Once installed and backfilled, it’s time to hook up the systems and bring the pool to life.
Plumbing and Electrical Connections for Container Pools
With the container pool physically in place (whether above-ground on a slab or nestled in the ground), the remaining tasks are to connect all utilities – primarily water circulation and electricity. The good news is that container pools often come with plumbing pre-installed internally; however, you still need to connect that plumbing to the equipment and ensure power is safely run to the pool’s systems. Here’s a guide to container pool plumbing and electrical work required:
Plumbing Setup and Equipment Installation
Filtration System:
As noted earlier, most container pools have a pump and filtration unit either built into one end or provided as a kit. If it’s built-in, you may just have to verify the connections. If not, you’ll need to install the pump and filter on a level surface within reach of the pool’s plumbing lines. Place the pump and filter assembly according to the manufacturer’s instructions (maintain appropriate distances, etc.). It should be below the water level of the pool if possible (to prime easier), or if above, ensure it’s self-priming.
Connecting Plumbing Lines:
Identify the pool’s plumbing stubs. Typically, you will have a suction line coming from the skimmer and return line(s) going to the jets. Connect the skimmer pipe to the pump’s intake port. Use PVC solvent cement for PVC pipes, making sure to prime and glue properly. From the pump’s outlet, connect to the filter inlet. After the filter, connect to the return line that goes back to the pool jets. If you have additional components like a heater or salt chlorinator, plumb those in line after the filter and before the return to the pool. Include valves where needed: for instance, a valve on the skimmer line is useful to shut flow for maintenance; a multi-port valve on the filter (if it’s a sand filter) allows backwashing. Container pool plumbing checklist: Before you finalize everything, run through a quick mental checklist of required plumbing elements:
- Skimmer installed and tightly sealed (no air leaks around it).
- Return jets installed and aimed appropriately (usually slightly downward and in a direction to circulate water).
- PVC connections: all glued joints are secure; any threaded fittings have thread tape; unions are installed on equipment for easy removal if needed.
- A drainage or backwash line connected (if using a sand filter or DE filter that requires backwashing, run the waste line to a safe discharge point or dry well).
- No leaks: Once you can, fill the system with water and check for leaks at all joints. It’s easier to fix now than later.
Priming and Testing:
Before running the pump, the system needs to be primed. Ensure the pump basket is filled with water and that the pool water level is above the skimmer so water flows to the pump by gravity. Turn on the pump and let it run, checking that water is circulating properly from the pool, through the filter, and back in. Watch for any sudden pressure drop or air bubbles (sign of suction side leak). Also, check that the filter pressure looks normal (consult your filter manual, but typically ~10-20 psi is common when clean). If you see any leaks, turn off and fix them (tighten clamps, re-glue if a joint is gushing).
Heater and Accessories:
If your container pool includes a heater (gas or electric heat pump), the plumbing will include that unit. Follow the specific instructions for those – ensure proper flow direction and that you’ve installed any needed bypass valves (some heaters require a minimum flow, and if you have a high-flow pump, a bypass can help regulate). Also, ensure the gas line or electrical hookup for the heater is done by a professional (gas heaters need proper gas supply and ventilation; heat pumps need a dedicated electrical circuit).
Water Fill and Balance:
At this point, you’ll be filling the pool (if not already filled during backfilling stage). Fill to the appropriate level (generally about mid-skimmer height). As it’s filling and once full, check again around all fitting penetrations (skimmer, returns, any light) for leaks. Also check outside the container (if above ground, walk around; if in-ground, look into the equipment or drain discharge for any sign of seeping). If everything is dry, great! Start balancing your water chemistry (test and adjust pH, chlorine, etc., as with any new pool).
Electrical Hookup and Safety
Electricity and water don’t mix – so this part must be done carefully and typically should be handled by a licensed electrician. Here’s what to cover in the container pool electrical hookup:
Power Supply:
Determine how you will get power to the pool’s pump (and any other electrical components like lights, heater, or an automatic cover). Most pool pumps require a dedicated 240V circuit (some smaller pumps are 120V, but many modern ones are 240V). You will likely need to run an underground electrical conduit from your house’s breaker panel to the pool area. Trench a line (depth requirements vary by code, usually 18 inches for PVC conduit with 120V/240V lines) from the house to the pool equipment location. Inside the conduit, run appropriately gauged wires for the pump circuit (and a separate circuit for lights if needed).
GFCI and Panel:
Pool circuits must be GFCI-protected according to electrical code (NEC). Typically, you’ll install a GFCI breaker in your main panel or a subpanel for the pool equipment. Alternatively, a GFCI receptacle or spa panel with GFCI can be used. This is critical to prevent electrical shock around the pool. Also, an emergency shutoff switch (disconnect) is usually required near the equipment so you can quickly cut power in an emergency or for service. Have your electrician mount a control panel or timer near the pool (some container pools come with a control box pre-wired; just connect your feed into it).
Bonding:
Bonding is an often overlooked yet crucial safety step. All metal parts of the pool and equipment must be bonded together with a continuous #8 AWG (or as required by code) copper bonding wire. This includes the container’s metal shell itself, the ladder, any handrails, the pump, filter (if metal), heater, and even the rebar in the concrete slab if you have one under the pool. Most shipping container pools will have a bonding lug welded to the container – attach your bond wire there. The idea is to equalize electrical potential so nobody gets a shock due to differing voltages. Everything within 5 feet of the pool that is metallic should be bonded. You’ll create a loop that ties all these components and then connect it to the bonding/ground system as per code.
Lighting:
If your pool has an underwater light, it should also be wired now. Pool lights must be low voltage (typically 12V) and GFCI protected. Usually there is a transformer that steps down the voltage, and the light niche will have a cord that runs through a conduit to a junction box above water level. Connect all that according to code, making sure the junction box is mounted higher than the water level and at least a certain distance from the pool (typically 12 inches above water, 4 inches above ground minimum, and 4 feet from the pool edge – check your local code). Again, ensure the light housing is bonded/grounded correctly.
Testing Electrical:
Once wired, test your circuits. Turn on the pump via the breaker or timer – it should run smoothly with no trips. Test the GFCI by pressing the test button to make sure it cuts power (and the pump stops). For lights, turn them on and off to verify operation. Also test any auxiliary systems (heater turning on, etc.). It’s wise to have an electrician do a final check with their equipment to ensure proper grounding and bonding – they may use a special meter to confirm everything.
Finish Up Safely:
After wiring, tidy up. Cover any open trenches after inspection. Label your breakers. And importantly, never allow anyone in the pool until electrical work is 100% complete and inspected. Water and improper wiring can be deadly.
At this stage, connect all utilities is checked off the list. Your container pool is physically in place, plumbed, powered, and operational. The circulation system should be running, filtering water, and perhaps heating if you have a heater. We’re nearly done! Next, we’ll address final inspections and any finishing touches before you dive in.
Final Steps: Inspections, Safety Checks, and Enjoyment
Before you declare victory and jump into your new container pool, there are a few final items to wrap up to ensure everything is safe, legal, and ready for long-term use.
Inspection and Approval:
Remember those permits we mentioned at the start? The final step is usually calling your local building department for a final inspection of the completed pool. The inspector will check that you followed code – this typically includes verifying the fence or barrier is in place, the electrical is up to code (GFCI, bonding, etc.), and possibly that the pool depth markers or other safety notices are present (some places require “no diving” signs if depth is under a certain limit). They might also look at the pool’s structure if it’s unusual, but since a container pool is pre-made, they’re mostly interested in the installation aspects. For a final inspection, container pool installation must meet all safety standards. Common things an inspector will verify: ladder or steps are secure, the pool is electrically bonded (they may actually see the bonding wire connections), GFCI outlets are working, and that your pool alarm (if required) is functioning. Once you pass the final inspection, you will get a sign-off indicating the project is complete and compliant. This is a big milestone – after final inspection, container pool installation is officially complete in the eyes of the law.
Troubleshooting and Punch List:
Do a personal walkthrough of everything. Check that all valves, lights, and features work as expected. If you have any small leaks (maybe a drip at a pipe joint), fix them now (tighten or re-seal). Ensure the pool water is balanced chemically – start your routine of testing pH, chlorine, etc. If you installed any accessories like handrails, make sure they’re tightly secured. Verify that the final inspection container pool installation checklist you had (if any) is fully ticked off. This might include making sure any landscaping or backfill has been tidied up as well.
Landscaping and Finishing Touches:
After installation, you’ll likely want to make the pool area look great. Backfilled soil around an in-ground pool can be regraded and sodded or paved. If above-ground, maybe add plants or privacy screens around the container to soften its look (just keep plants a little back so you can still access the pool walls for maintenance). If you planned for a deck, now’s the time to build it around the pool, assuming the structure is all done and inspected. Also consider adding a cover to your pool – a safety cover or even an automatic cover can be installed on many container pools, which helps keep debris out and adds safety.
Maintenance Plan:
Think ahead about caring for your container pool. Maintenance is similar to any pool (regular cleaning, chemical balancing, servicing the filter). One extra thing: periodically inspect the container’s steel for any signs of rust or paint blistering, especially if you notice a chip or scratch in the paint. Address it early by sanding and repainting with a rust-inhibiting paint. This will prolong the life of your pool. If you did a DIY build, you might have some DIY waterproofing and repair solution product leftover – keep it handy for touch-ups. For example, if a bit of rust shows up, you can treat that spot and re-coat with your waterproofing product. Staying on top of these small maintenance items will prevent larger issues. (We’ll cover a few maintenance FAQs at the end as well.)
Swimming Time:
Now for the best part – enjoying your new pool! Once everything checks out, you can fill the pool to its normal level (if not already filled) and start the pump. Add the necessary pool chemicals and let the water circulate and clear. Typically, you might shock the pool the first time and run the filter for 24 hours to ensure water quality. Then, hop in! Keep in mind, the water might take a day or two to reach comfortable temperature if you filled from a cold hose – heaters can help speed this up. But there’s nothing quite like that first dip in a project you saw through from start to finish.
Finally, take a moment to appreciate what you’ve accomplished. In a matter of weeks (or even days), you transformed a simple steel box into a modern, functional swimming pool. Not only is it a conversation piece, but it’s also a refreshing oasis in your backyard.
Before we wrap up, let’s summarize costs and address some common questions:
How Much Does It Cost to Install a Shipping Container Pool?
One of the top questions prospective buyers ask is about cost. How much does it cost to install a shipping container pool? The answer can vary widely based on DIY vs. professional installation, size, features, and your location. Here’s a breakdown of cost factors:
Container Pool Unit Price:
The container pool itself (if buying from a manufacturer) typically ranges from around $20,000 on the low end up to $50,000 or more on the high end, for a standard size like 8’ x 20’. Larger 40-foot models or pools with custom features (windows, hot tub sections, etc.) can go $60,000–$100,000. These prices usually include the pool structure with interior finish, plumbing, and basic equipment.
Delivery and Installation:
On top of the pool cost, you have delivery and setting it in place. Crane rental or delivery fees might add $1,000–$5,000 depending on distance and complexity. If a professional crew handles the installation, their labor could be a few thousand dollars more for site work, assembly, and hookups.
Site Preparation:
Don’t forget the prep costs. Excavation for in-ground can cost a few hundred to a few thousand dollars (depending on depth and soil conditions). A concrete slab might cost $3,000–$5,000 for a 20’ pad (materials and labor). Simpler leveling and gravel could be $500–$1,000. If you require landscaping, retaining walls, or other site improvements, budget accordingly.
Electrical and Plumbing Hookups:
Hiring electricians and plumbers adds to cost. Electrical work for a pool (running a new circuit, GFCI, bonding) might be $1,000–$2,500 depending on how far your main panel is and local rates. Plumbing might be similar if you have a gas heater or need sewer connection for backwash, etc. If you do a lot yourself, you can save here, but always prioritize safety.
Permits and Fees:
Permitting can range from $100 to $500 or more, again depending on locale. There might be plan review fees, and if you need an engineer’s stamp on plans, that’s an additional cost (perhaps a few hundred dollars). HOA approvals might cost you just time, unless they require specific modifications.
Extras:
Think about the extras like decking, lighting, heating, covers. A nice wood deck around the pool could be a few thousand dollars in materials. A gas pool heater might be $2,000 plus installation, while a heat pump could be $3,000–$5,000. Saltwater chlorination systems are a few hundred dollars. These are optional but can enhance your pool experience (and add to cost).
To give a rough average: many homeowners report total installed costs in the ballpark of $35,000 – $65,000 for a shipping container pool, all-in. That typically covers a basic 20-foot pool with installation. It’s not unusual to spend about $50,000 when you include the pool, shipping, crane, slab, electrical, etc. This is indeed often less than a traditional concrete pool (which might run $75k+ for similar size), but it’s comparable to some fiberglass pool installations. Keep in mind upgrades will push the cost higher.
What about doing it on a tight budget? A DIY shipping container pool project could cost under $20,000 to install if you handle most tasks yourself. For example, you find a used container for $3,000, spend $5,000 on modifications and liner, $4,000 on equipment, and a few thousand on concrete and rentals – it is feasible to come in under $20k in materials. However, this doesn’t account for your labor value and time. Realistically, many DIY builds still end up in the $20k–$30k range after all the odds and ends.
The operational costs are also worth noting: expect maintenance and electricity to cost a few hundred dollars a year. Container pools are smaller, so they use fewer chemicals on average (perhaps $300–$600/year) and less water to top-up. If heated, fuel costs depend on usage.
In summary, container pools provide an inexpensive alternative to high-end luxury pools, but they are still a significant investment. You get a lot of value through quick installation and unique design. Next, let’s address the cost of a DIY conversion specifically and some other common questions.
How Much Does It Cost to Turn a Shipping Container into a Pool?
If you’re considering going the full DIY route – converting a plain shipping container yourself – you’re probably asking this question. How much does it cost to turn a shipping container into a pool? The range can be broad, but here’s a rough estimate of major expenses in a DIY build:
Container:
$2,000 to $5,000 for a used 20-ft container in decent shape (delivery to you might add a bit). Newer or one-trip containers could be $6,000+.
Structural Mods (Cutting & Steel):
Maybe $500–$1,500 for steel materials (new beams for reinforcement, welding rods, etc.). If you don’t have welding equipment, add rental or hiring a welder for a day or two.
Waterproofing & Lining:
Could range from a few hundred for paint (epoxy kits might be $300–$600) up to $5,000 if you go for a professional liner or fiberglass insert. For example, a heavy-duty pool liner custom made might cost $1,000–$2,000.
Plumbing & Filtration:
A pool pump and filter set for a pool this size might run $800–$1,500 (cartridge or sand filter plus a 1 HP pump, for instance). PVC pipes, fittings, valves, skimmer, jets, etc. might tally another $500–$800.
Electrical gear:
If you’re DIY, maybe $200–$500 for wire, conduit, and a basic subpanel. (Still likely you’d have an electrician do the final hookup for safety.)
Concrete/Gravel & Crane:
If you need a slab, that could be $2,000–$3,000 DIY (mixing yourself or mini mixer) or similar if hiring out. A crane for an hour or two could be $500–$1000. Alternatively, if above-ground, maybe you can get away with jacking and blocking it into place if truly DIY (saves crane cost but a bit tricky and potentially unsafe without proper equipment).
Miscellaneous:
Rust-proof paints, brushes, hardware, bolts, sealants, permits, etc. – easily another $1,000+ in all those little things that add up.
By these numbers, you might achieve it around $15,000 on the very low end (especially if you already own tools and perhaps got some materials at a deal). More realistically, budgeting $20k–$25k is wise to have contingency. It’s common for DIY projects to discover extra costs along the way (like renting a bigger grinder, extra concrete bags, etc.).
So yes, it is possible that a DIY shipping container pool project could cost under $20,000 to install, but that assumes a lot of self-labor and thrifty choices. It’s still significantly cheaper than buying a turnkey unit, but you earn that savings through your effort. If your time is valuable or you lack certain skills, sometimes going with a prefab container pool ends up being more cost-effective in the grand scheme.
Now that costs are covered, let’s consider some pros and cons to evaluate if a container pool is right for you.
What Are the Drawbacks of Container Pools?
Shipping container pools are clever and trendy, but they aren’t perfect for every situation. It’s important to weigh the downsides. What are the drawbacks of container pools? Here are some key considerations:
Limited Size and Shape:
A container pool is, by nature, long and narrow. Most are 8 feet wide externally (about 7 feet internal swim width) – which is significantly narrower than many traditional pools. You’re largely limited to a rectangular, uniform shape. This is great for laps or small groups, but if you envision a large, free-form swimming area, container pools may feel confining. The length (20 or 40 feet typically) allows swimming laps, but the narrow width means you can’t have a big “deep end vs shallow end” or wide play area. If you have many swimmers, it could get crowded compared to a wider pool.
Aesthetics (Industrial Look):
Not everyone loves the appearance of a cargo container in their yard. The shipping container look isn’t for everyone. Above-ground, you’ll see the corrugated metal walls – some find it cool and modern, others find it an eyesore or too utilitarian. You can dress it up (as mentioned, with cladding or decking), but that’s extra work and cost. In some neighborhoods, a plain container might draw unwanted attention or violate aesthetic rules (hence the HOA concerns).
One Entry/Exit Point:
If the container pool is fully above ground with only one stair or ladder access, you effectively have a single entry/exit. Above-ground containers may offer only one entry and exit point, unlike a ground-level pool where you can hop in/out from any side or multiple ladders. This might be minor, but for families with kids, it means everyone tends to use the same spot to climb out. Also, rescuing someone in an emergency could be slightly less straightforward if there’s only one way in. Partially burying or adding wraparound decking can mitigate this by allowing more access points.
All One Depth:
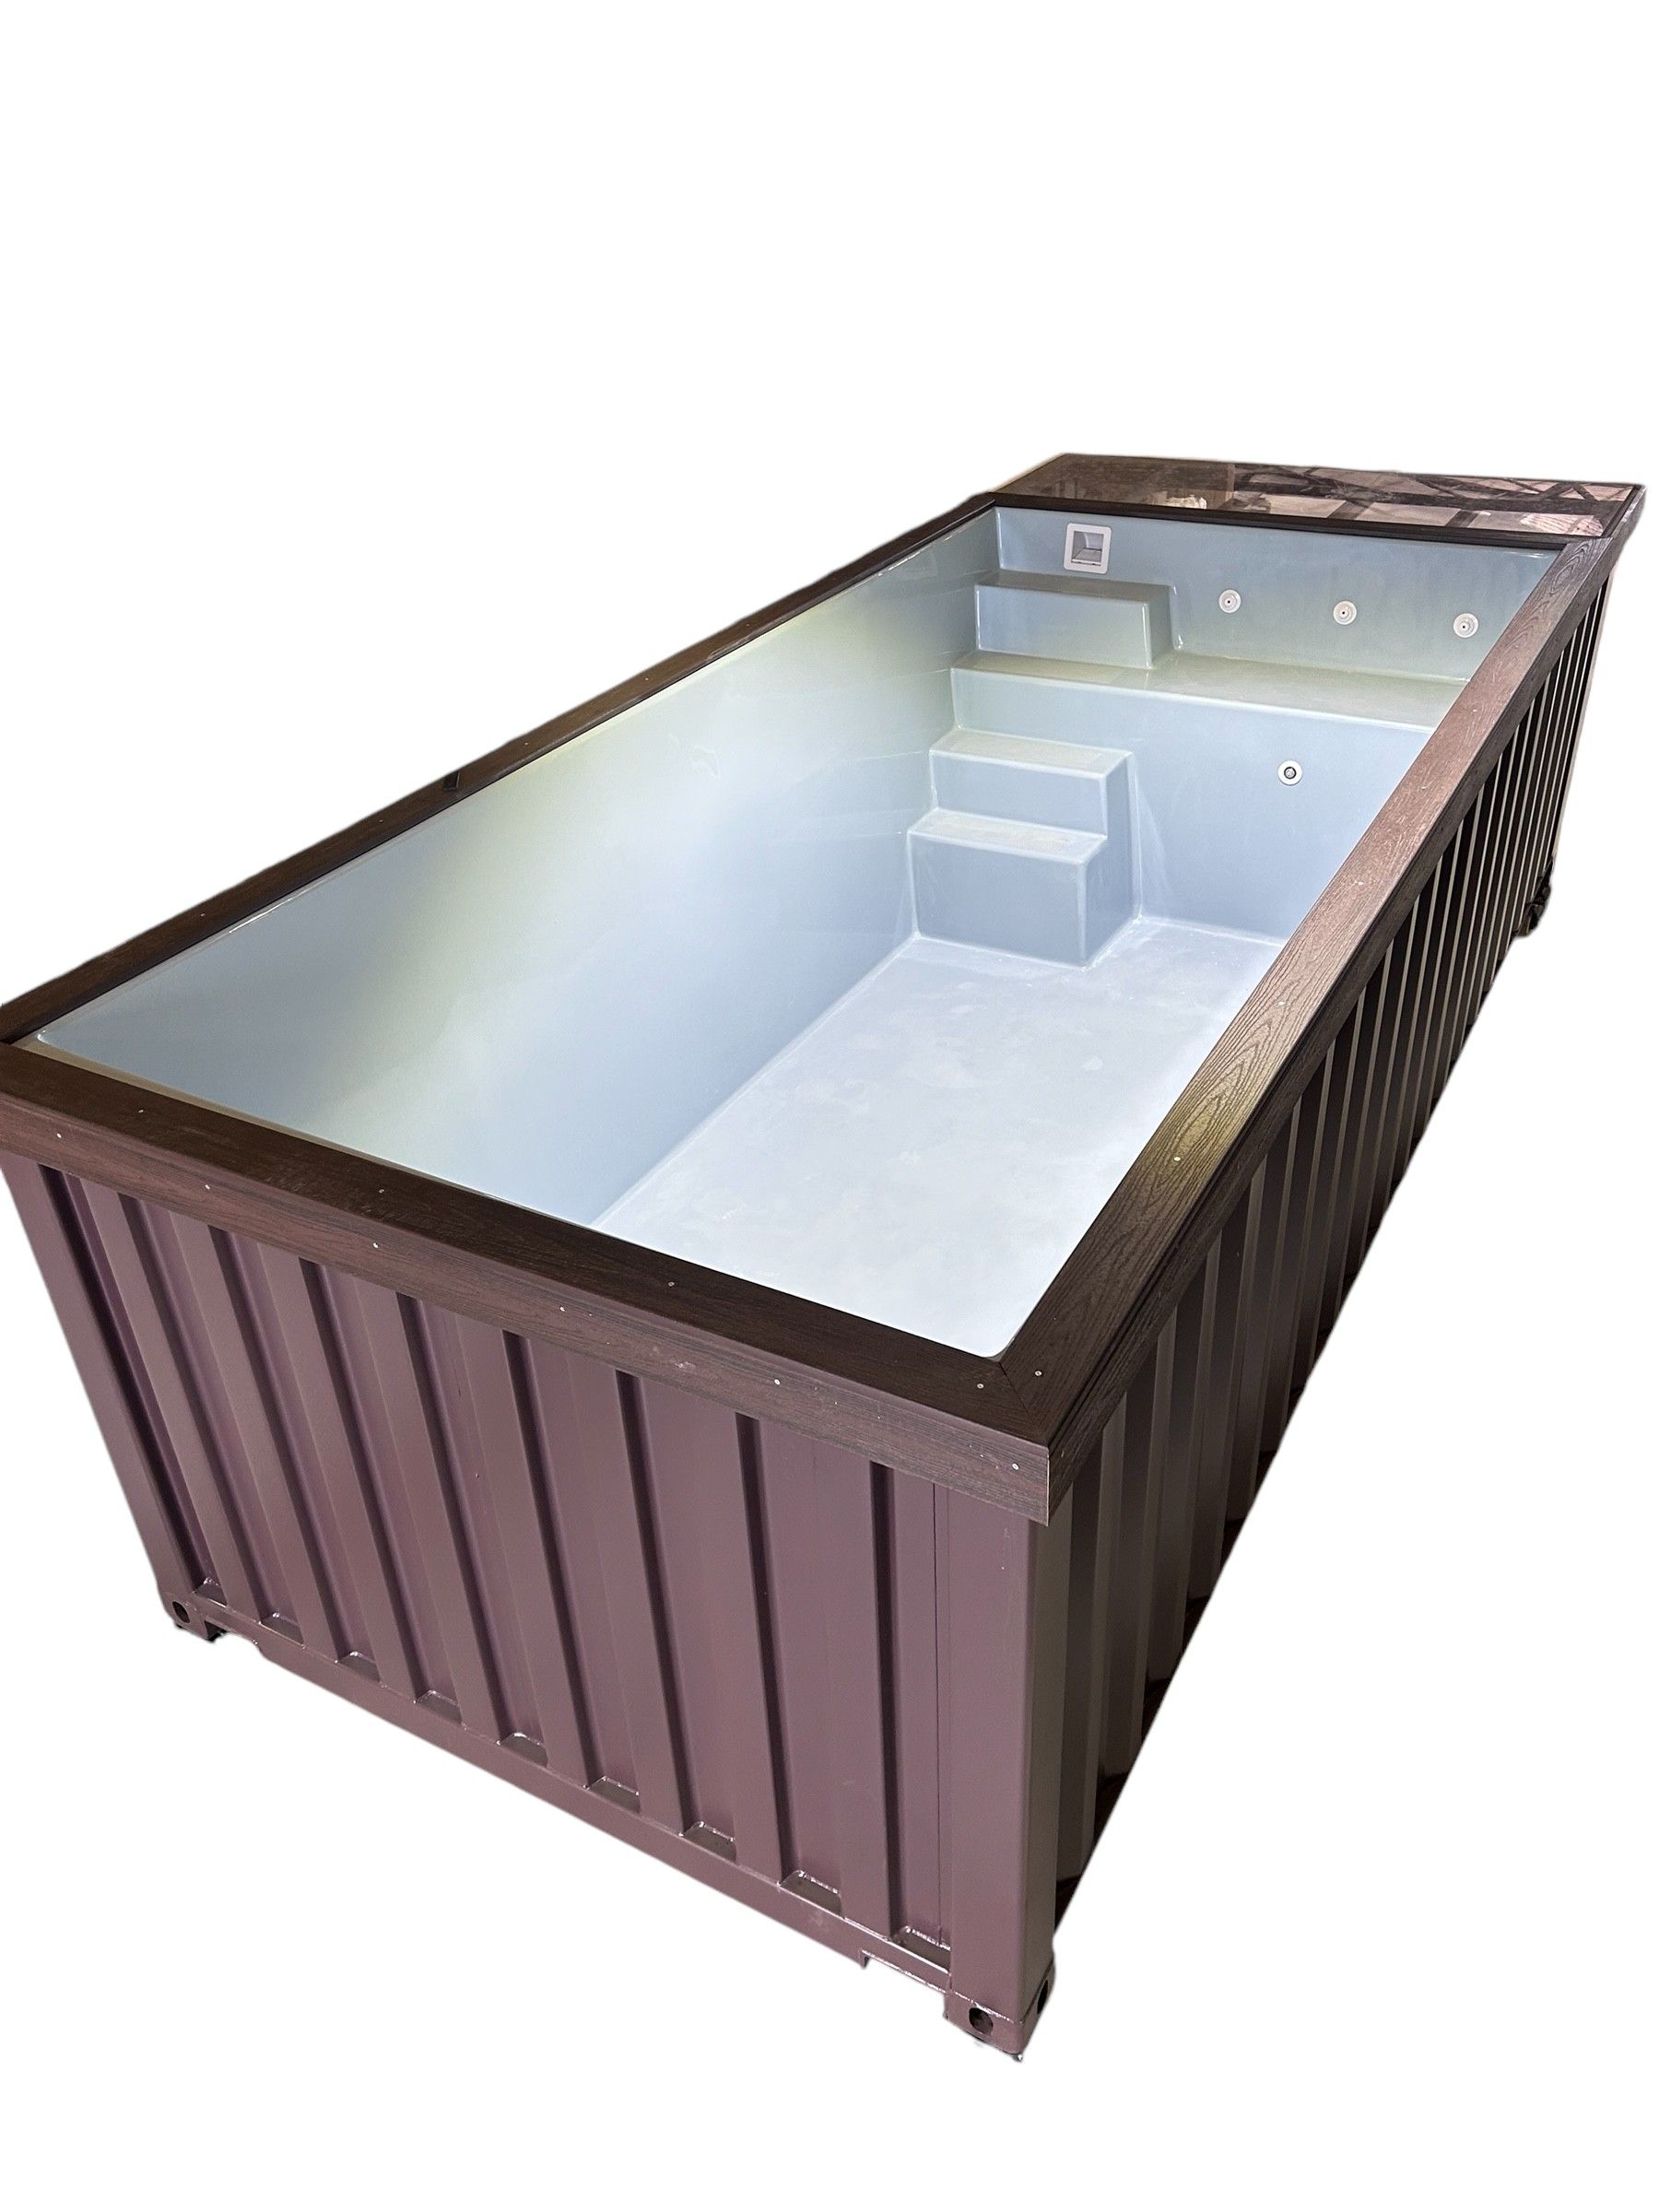
Container pools are usually a uniform depth (whatever the container height is). You won’t have a shallow wading area and a deep end – it’s the same depth throughout (often around 4 to 5 feet of water). You can’t easily have a true deep diving end without significant custom modifications. That means no diving allowed typically (the pool isn’t deep enough), and young kids who can’t stand might need floatation since there’s no shallow end (unless you design a separate section or shelf). Some manufacturers add internal seating or shallow ledges to create multi-depth zones, but within the same basic container dimension.
Quality and Longevity Concerns:
The quality is not guaranteed across all builds. Since container pools are a relatively new concept, not all manufacturers have a long track record. If DIY, your workmanship matters; any flaw in waterproofing or structural reinforcement could cause issues like leaks or warping. Even some professional builds have reported problems like rust appearing within a couple of years because paint systems failed. Traditional pools (fiberglass, concrete) have well-known lifespans; container pools are still proving themselves. Many use coatings or liners to protect steel – those liners can tear or coatings can chip, requiring repairs. The metal will rust if exposed – even galvanized steel eventually – so vigilance is needed to keep the pool sealed. We generally expect a container pool, if well-maintained, to last maybe 20 years or more, but it may require re-coating or liner replacements periodically. It’s not “set it and forget it” forever.
Thermal Considerations:
Metal walls conduct temperature like crazy. In hot sun, the pool water can heat up as the steel container sides absorb heat. Conversely, if the ground is cold or nights are chilly, the water cools faster because the container doesn’t insulate well. This means you might need to invest in more insulation or heating than a traditional pool to maintain comfortable temperatures. Insulating the exterior or using a pool cover when not in use are common solutions. Still, expect the water to fluctuate more with ambient conditions unless mitigated.
Customizing Is Limited:
With a concrete pool you can shape it any way; with a container you’re largely set in its dimensions. You can add some features (e.g. a window panel cut into the side for a cool viewing glass, or dividing part of a 40’ container into a spa and pool section), but every customization requires cutting and reinforcing steel – not trivial tasks. That can drive the cost up or be beyond a DIYer’s ability. If you really want a unique pool shape or size, a container pool might not suit your vision.
Comparable Cost to Other Pools:
We often assume container pools are cheap, but they can be as expensive as traditional pools when fully installed with all features. For instance, adding nice decking, a heater, automated systems, etc., can bring your investment close to what a similarly equipped fiberglass pool might have cost. And when selling your home, a container pool is still somewhat niche – it might not add value in the same way an in-ground gunite pool would (some buyers might even not want it). So the “worth” is subjective (we’ll discuss that next).
In short, container pools trade off flexibility and sometimes longevity for convenience and novelty. What are the drawbacks of container pools? Limited size, potential aesthetic challenges, need for vigilant maintenance against rust, and the possibility that cost savings aren’t huge once all is said and done, are the main ones.
However, many of these cons have solutions: you can disguise the look, take care of the steel, and enjoy the pool for many years. Now let’s consider whether it’s all worth it to help you decide.
Are Shipping Container Pools Worth It?
Ultimately, the question of value comes down to your priorities. Are shipping container pools worth it? The answer will depend on what you’re looking for in a pool experience:
Speed and Convenience:
If you want a pool fast, container pools shine. They can be installed far quicker than traditional pools – sometimes in just a day or two on site, after a few weeks of prep. For someone who despises a long construction project in their yard, this is a huge plus. The convenience of a pre-built pool that’s simply delivered is a major value proposition. In this sense, yes, it’s “worth it” if time is money or you have a narrow window to get a pool in (for example, you want it ready by summer and don’t have months for a normal build).
Portability:
Do you plan to move in the future? One unique aspect is you can theoretically take your container pool with you if you move. Unlike a fixed in-ground pool which stays with the house, a container pool can be uninstalled and transported. If you invest tens of thousands in it, you don’t necessarily lose it upon selling your property (though moving it isn’t free, it’s doable). For people who like that idea, a container pool is worth it. This mobility also means if you want to re-position the pool or remove it later (say you need that space for an addition or you just change your mind), you can – it’s not permanent.
Space and Design:
Container pools are worth it for small or urban yards where a conventional pool might not be feasible. The compact footprint and above-ground option mean you can have a pool in places a traditional pool couldn’t easily go (like on a sloped lot or even temporarily in a location). Also, if you love modern, industrial design, the aesthetic of a container pool might be very appealing and complement your style – making it subjectively more “worth it” to you than a plain concrete hole.
Cost Considerations:
If you manage to get a container pool at a significantly lower cost than other options, that obviously contributes to worth. For example, maybe you snagged a lightly used demo unit or did partial DIY and came out well under budget – you’ll feel quite satisfied with what you got for the price. However, if the costs end up similar to a regular pool, you must consider the trade-offs: you got a pool that perhaps is smaller or has some maintenance quirks (rust), versus a more traditional pool that might be larger or more standard. For many, container pools are still worth it because you typically do save on the high end costs (some luxury concrete pools can be $100k+, whereas even a decked-out container pool might cap around $60–$70k).
Enjoyment and Usage:
The core of “worth it” is will you enjoy it? A container pool provides the same basic joy of swimming, cooling off in summer, entertaining friends, and adding beauty to your yard as any pool does. If those benefits align with what you want and you accept the constraints (like smaller size), then it’s absolutely worth it. People who own container pools often love them – they talk about the unique conversation piece it is, and how quick the whole process was. If you’re a person who likes to be a bit different and appreciates innovation, a container pool definitely has a cool factor that might tip the scales for you.
In summary, are shipping container pools worth it? – for many, yes, because they deliver a functional pool faster and sometimes cheaper, with a stylish twist. But they are not a one-size-fits-all solution; those wanting a large resort-like pool or zero maintenance might lean another direction. Evaluate your budget, timeline, and how you plan to use the pool. If a container pool checks the right boxes for you, it can be a fantastic addition to your home that provides years of enjoyment.
By now, we’ve covered how to install your shipping container pool in the ground, on a concrete pad above ground, and how to DIY the conversion. We’ve talked foundations, permits, container pool waterproofing, plumbing, electrical, costs, and pros/cons. You should have a clear roadmap for planning and executing a container pool project in your backyard.
If you’re feeling excited and confident about taking the next step, that’s great! For many folks, the final piece is finding the right pool for the right price and getting the installation done professionally. Others might be ready to roll up their sleeves for a DIY adventure. Whichever path you choose, a little upfront planning and knowledge (which you now have) will save a lot of hassle down the line.
Ready to transform your backyard with a shipping container pool? Let’s talk about how we can help make it happen, and then we’ll wrap up with some quick FAQs to recap key points.
Ready to Dive In? – Get a Quote for Your Custom Container Pool
If you’re ready to buy a shipping container pool or explore options, we’re here to assist. At Midwest Container Pools, we offer shipping container pools for sale and can guide you through every step of the process – from design to installation. Whether you want a turnkey pool delivered or you need advice on a DIY waterproofing, and repair solution, our experts have you covered.
Get Shipping Container Pool Quotes: Not sure about the shipping container pool cost for your specific project? We provide personalized shipping container pool quotes. Just reach out with your desired size, features, and location, and we’ll give you a transparent estimate. We can detail the shipping container pool cost installed, including delivery and setup, so you know exactly what to budget.
Custom Designs: Every backyard is different. We specialize in custom shipping container pools that fit your space and style. Want a pool with a built-in spa section, or a unique color interior? Looking at a partially in-ground setup with a glass window wall? We love getting creative. Our engineering team ensures structural integrity (with engineer certification for container foundation and modifications when needed), so your custom idea becomes a safe reality.
Installation Services: Even if you plan on installing a container pool yourself, it doesn’t hurt to consult with us. We can handle the heavy lifting – literally. From preparing a concrete slab requirements for container pool to arranging the container pool crane delivery, our crew makes installation smooth and stress-free. Everything from container pool electrical hookup to final startup can be managed by our professionals, or we can work alongside you in a supporting role if you’re going the DIY route.
Why Choose Us: We bring years of experience with container pools specifically. Our team understands container pool foundation requirements, proper container pool leveling and positioning, and the nuances that general pool installers might miss (like extra anti-rust measures for our region’s climate). When we install, you can trust that first we prepare the site by leveling the ground and creating a strong foundation, such as a concrete slab. Next, we modify the container (if it’s a custom build), reinforcing it and making it watertight, and install the necessary plumbing and filtration systems. Finally, we install the pool in its prepared location and connect all utilities. We’ve essentially written the book on container pool installs – and we stand by our work.
No Surprises Pricing: We don’t believe in hidden fees. When you request a quote, we include shipping container pool cost, delivery, installation labor, and any options you choose. You’ll see the breakdown of shipping container pool cost installed versus kit pricing if applicable. This way, you can compare and decide what’s best for you. We won’t be offended if you decide to do parts yourself – we’re happy to just supply a quality pool and give tips.
So, if you’re excited to take the plunge (literally) into container pool ownership, contact us today for a friendly consultation and quote. We’ll help you turn that steel box into your family’s private swimming spot in the most efficient way possible.
Still have questions? Below, we’ve compiled a list of frequently asked questions to recap and clarify common concerns about shipping container pool installation. Read on to reinforce your knowledge and set your mind at ease about this innovative pool option.
Frequently Asked Questions (FAQ)
Q1: How much does it cost to install a shipping container pool?
A: On average, a shipping container pool costs around $35,000 to $65,000 installed for a basic 20-foot model, with about $50,000 being common for a turn-key setup. This includes the pool unit, delivery, and installation. The exact cost depends on factors like pool size (8’x20’ vs 8’x40’), added features (windows, heaters, etc.), site preparation needs, and local labor rates. If you DIY, you might reduce costs – some handy homeowners have built basic container pools for under $20,000 in materials. However, going the DIY route means investing your own labor and possibly simplifying features. Always budget for permits and a contingency, since unexpected expenses can arise.
Q2: Are shipping container pools easy to install?
A: Relative to constructing a traditional in-ground pool, yes – shipping container pools are generally easier and faster to install. Much of the fabrication (waterproofing, plumbing, structure) is done off-site beforehand if you buy a prefab unit. Installation often involves simply preparing a level foundation, having the container delivered (usually by crane), and hooking up plumbing and electrical connections. Many container pools can be set in place in a single day. That said, “easy” doesn’t mean you can skip proper planning. You still need to ensure the site is correctly prepared and follow all safety steps. But compared to months of pool construction, a container pool install is a breeze. If you’re moderately handy, you might consider it a doable DIY project – though professional help with electrical and heavy lifting is recommended. So, are shipping container pools easy to install? – They’re easier than building a pool from scratch, but they do require some coordination and muscle due to the size and weight of the container.
Q3: Do you need a permit for a shipping container pool?
A: In most jurisdictions, yes, you will need a permit just as you would for any swimming pool. Shipping container pools are regulated under the same building and safety codes as other pools. This typically means you’ll apply for a residential pool permit, submit plans (showing where the pool will sit, how you’ll provide power, barrier details, etc.), and get approval before installation. Additionally, electrical work will require an electrical permit, and sometimes a separate plumbing permit if connecting to drainage. Inspection of the completed pool (fencing, electrical, etc.) will be required for final sign-off. Always check with your local building department for specifics – some places might have unique rules for above-ground vs in-ground pools, or regarding the use of repurposed structures. Don’t be tempted to skip permits; not only is it unsafe, but an unpermitted pool could cause issues with insurance or when selling your home.
Q4: What are the drawbacks of container pools?
A: The main drawbacks include:
- Limited size/shape: Container pools are long and narrow, usually 8 feet wide, which limits space for free swimming or large groups.
- Industrial aesthetics: The corrugated steel look isn’t everyone’s favorite; it may require additional work to beautify.
- Uniform depth: Typically there’s no shallow end – the pool is one depth throughout (around 4 feet of water), which isn’t ideal for small kids or diving.
- Potential for rust/corrosion: Since they’re made of steel, container pools can rust if the protective coatings or liners fail. Saltwater systems can accelerate corrosion if not accounted for.
- Insulation needs: Metal walls can make the water get cold faster and hot faster, meaning you might need a heater or insulation to maintain comfortable temperatures.
- Customization limits: You can’t easily change the shape or add curves – you’re working within a fixed rectangular footprint.
- Comparable costs: If you add a lot of extras, the cost might approach that of a traditional pool, so savings aren’t always huge.
Despite these drawbacks, many people find the advantages (quick install, cool look, portability) make container pools worthwhile. It’s about what suits your needs and preferences.
Q5: How much does it cost to turn a shipping container into a pool?
A: Doing a DIY conversion of a shipping container into a pool can cost anywhere from around $15,000 on the extreme low end (using bargain materials and doing all labor yourself) to $30,000 or more for a more fully featured DIY build. Key expenses include the container itself (maybe $3k-$6k depending on condition and size), interior waterproofing (could be a $1k-$5k range depending on liner vs. coating), structural reinforcements (a few hundred in steel, plus welding supplies or labor), plumbing equipment (pump, filter, pipes – perhaps $1.5k), and foundation/installation costs (slab or base, crane rental – another couple thousand). If you already have some materials or skills, you might save. People often cite the figure that a DIY project could be done under $20k – and that is possible if you’re thrifty and keep it simple. But always plan for some extra costs. If you aim for $20k, be prepared that it might creep into mid-20s by completion. Still, this can be significantly less than buying a ready-made unit, at the expense of a lot of personal labor.
Q6: Are shipping container pools worth it?
A: For many homeowners, yes, shipping container pools are worth it. They offer several unique benefits: incredibly fast installation times (you could be swimming within weeks instead of months), the ability to take the pool with you if you move (it’s essentially a portable asset), and a trendy modern design that can boost your yard’s wow-factor. They often come at a lower cost than custom-built concrete pools, making them attractive for getting a pool on a budget. However, “worth it” depends on your situation. If you have a small yard, a container pool can maximize swimming area in a compact footprint – very worthwhile. If you desire a very large or deep pool, a container pool might not satisfy you. Maintenance-wise, they’re similar to other pools, though you do have to be mindful of the steel structure (ensuring it stays coated and rust-free). In terms of home value, a well-done container pool can add value, but perhaps not as much as a more permanent in-ground pool in some markets. In the end, if you appreciate the aesthetic and need a quicker, possibly more affordable pool solution, a container pool is definitely worth considering.
Q7: How long does it take to install a shipping container pool?
A: The installation on-site is very quick – often just 1 to 3 days! Preparation of the site might take a few days to a couple of weeks (especially if concrete needs to cure or if you’re doing excavation and then waiting on inspections). But compared to traditional pools which can take 2–3 months of construction, container pools are lightning fast. A typical timeline might be: a day or two to prepare the ground and pour slab (then a week of curing), the container pool gets delivered and craned into place in a couple of hours, and the same day or next day the crew connects the plumbing and electrical. You could realistically be filling the pool and swimming within a week or two of starting work (assuming the container unit was already fabricated or delivered in that timeframe). The longest lead time often is ordering the container pool itself from a manufacturer – that could be several weeks of fabrication. But once the unit is ready and site is ready, installation is often completed in one day (for above-ground) or a few days (for in-ground, allowing time for backfilling and such). It’s one of the fastest ways to get a permanent pool.
Q8: How long do shipping container pools last?
A: With proper care, a shipping container pool can last 20 years or more. The steel container itself is quite durable structurally, and manufacturers design the interior to be as long-lasting as possible (using marine-grade epoxy, vinyl liners, or specialized membrane liners, etc.). However, certain components will have their own lifespans: pool liners might last 7-10 years before needing replacement, pumps typically last 5-10 years, and heaters maybe 7-15 years. The steel shell will last decades if kept from rusting – that means promptly touching up any scratches or worn paint, ensuring good drainage around it, and not exposing it to corrosive salt without proper coatings. Some owners report minor rust spots appearing after a couple of years in highly exposed areas, but these can be treated. Think of it like maintaining a car body – a little TLC goes a long way. If you live in a harsh climate (e.g., salty air near the ocean), additional protective measures can extend the life (extra coatings, using sacrificial anodes to prevent rust, etc.). Overall, you should expect a container pool to serve you well for a couple of decades. Many companies offer warranties around 10 years on structure, which gives an idea of confidence, and it’s likely they’ll go strong well beyond that with upkeep.
Q9: How deep is a shipping container pool?
A: Most shipping container pools use standard container heights for depth. A standard container is about 8.5 feet tall externally. However, the usable water depth is less because you’re not filling it to the brim. Typically, water depth is in the range of 4 to 5 feet. Here’s why: many container pools have a built-in bench or shallow section at one end which raises the floor a bit, and you also don’t fill to the absolute top to avoid overflow. Some container pools are made from “high cube” containers (9.5 feet tall) but again, you wouldn’t fill all that – you might get a bit over 6 feet of depth in that scenario if designed for extra depth (rare). In practice, most container pools are like an above-ground pool depth – comfortable for adults to stand in (chest-high water). They are not deep enough for diving. If you need varying depths, some designs incorporate an internal platform or two levels (for example, a shallow kiddie area and a deeper swim area), but the depths will still be within that overall container height. Always check the specs from your pool provider: they’ll usually list water depth. But generally, expect something like 4’ to 4’6” of water depth as the norm.
Q10: How do you maintain a shipping container pool?
A: Maintenance for a container pool is very similar to any other pool:
- Regular Cleaning: Skim leaves off the surface, vacuum the bottom or use an automatic pool cleaner, and clean the skimmer basket weekly.
- Chemical Balance: Test water chemistry (pH, chlorine levels, alkalinity, etc.) a couple of times a week and adjust chemicals to keep the water clear and safe. Even a smaller volume of water needs proper chlorination or sanitation.
- Filter Maintenance: Clean or backwash your filter as needed (with a cartridge filter, rinse the cartridge every few weeks; with a sand filter, backwash when pressure rises, typically every few weeks).
- Winterizing (if in cold climate): In winter, you should winterize the pool similar to an above-ground pool. That means blowing out and plugging plumbing lines, draining the filter and pump, adding winterizing chemicals, and covering the pool. The container structure itself can handle cold fine, but you don’t want water freezing in the pipes or equipment.
- Inspecting the Structure: This is one extra step unique to container pools. At least annually, do a walk-around and look closely at the container’s paint and steel. If you see any paint peeling or a rusty spot, wire-brush it and touch it up with a rust-inhibiting primer and paint. Keep the exterior drainage good – ensure gutters or landscape grading prevent standing water against the container. If your pool has a liner, occasionally check the liner for tears or wear.
- Equipment Checks: Treat the pump and heater like you would in any pool – listen for strange noises (could indicate bearing wear), and schedule any tune-ups or part replacements as needed.
- Cover usage: Using a pool cover when the pool is not in use (especially in the off-season or at night) will greatly reduce debris and heat loss, easing maintenance.
In summary, maintaining a container pool isn’t harder than a traditional pool. Stay on top of water care and keep the steel protected, and you’ll find it’s quite manageable. Many owners find the smaller volume of container pools even easier/cheaper to maintain chemically than a large in-ground pool.
We hope this comprehensive guide has answered your questions and given you the confidence to proceed with your shipping container pool installation. With the right preparation and partners, you’ll soon be lounging in your very own container pool – a testament to modern ingenuity and a source of endless backyard fun. Happy swimming!